Sunday, November 10, 2013

Desrestriction basics for 50cc scooters gain more power

his thread is for people who are legally eligible to de-restrict a 50cc scoot. All others do so at your own peril.

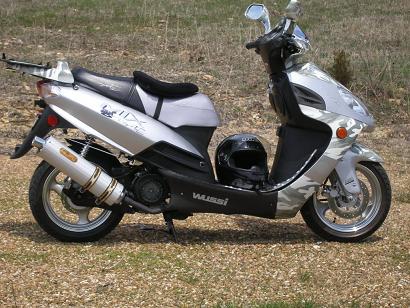
The restrictions used on these scooters vary. Here's the ones I know of personally:

Throttle restrictor screw shown in motion here. Just remove it if you have it.


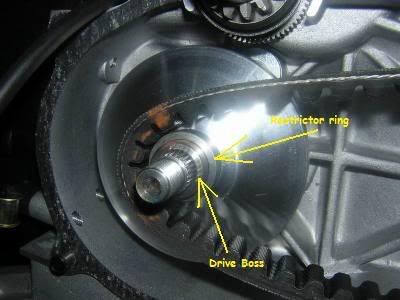
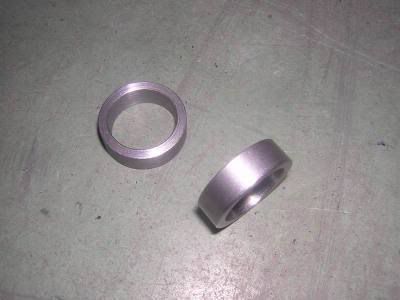
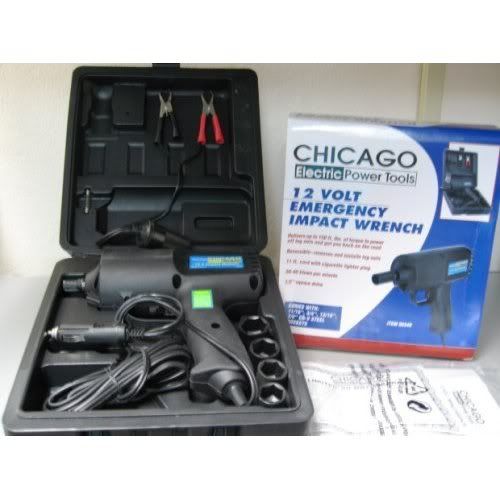
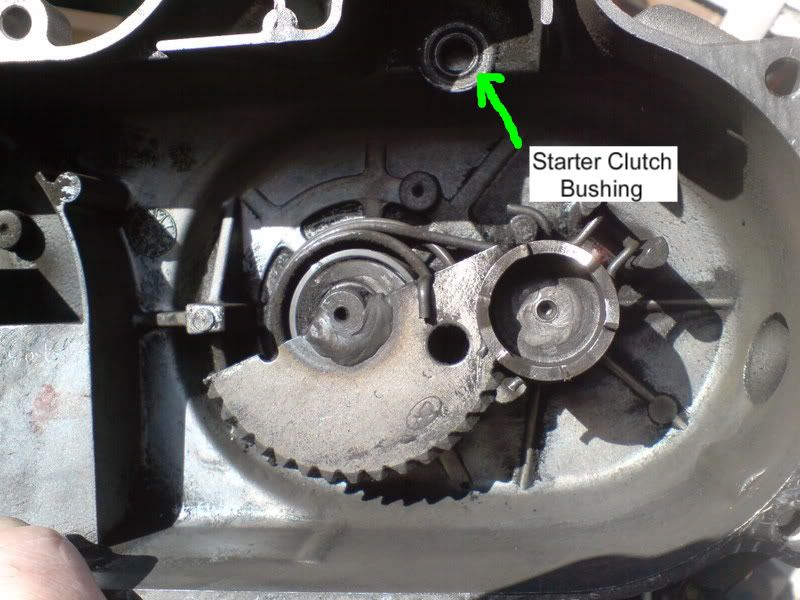
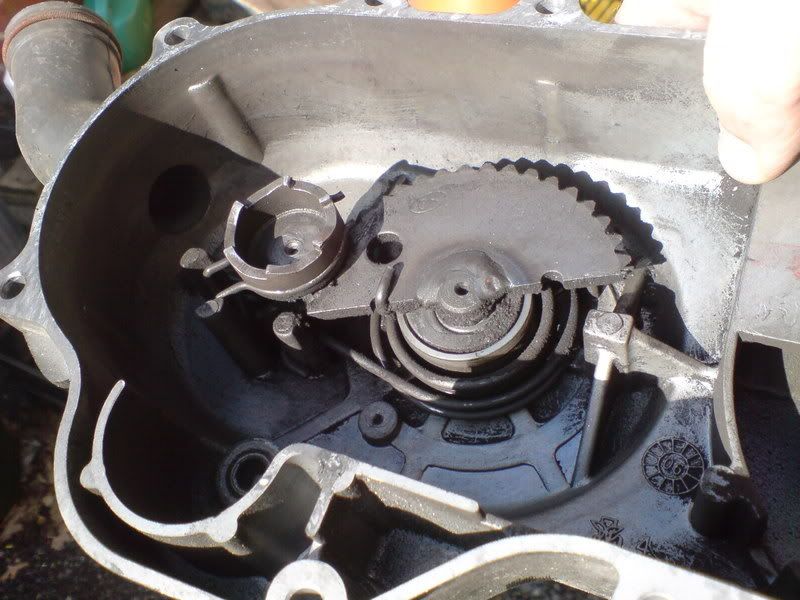
Variator restrictor ring. It stops the variator pulley halves from closing together completely. Again, remove it if you have it. You'll need an Impact wrench. I use a 12 volt one for emergency tire changes. It works off the scooter battery. $30 at Harbor Freight, auto parts stores and Ebay has 'em too.


 Rings:


Impact like mine:


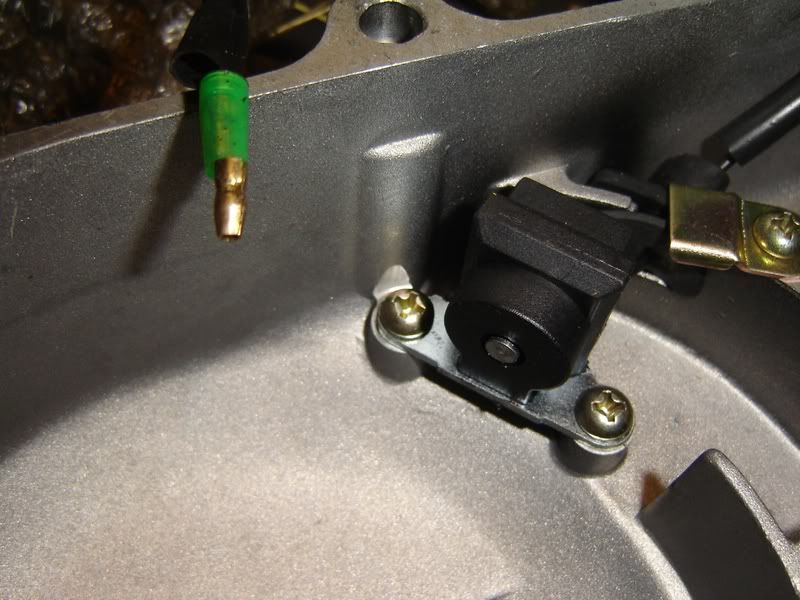
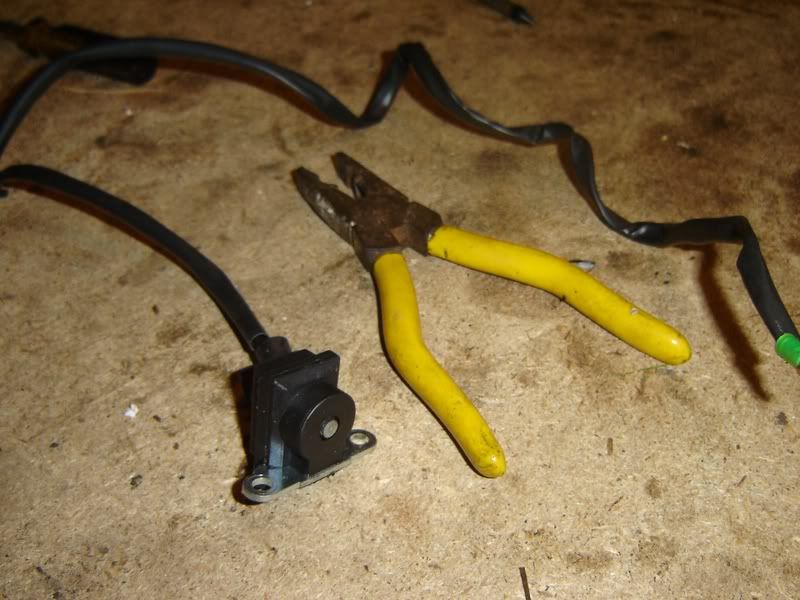
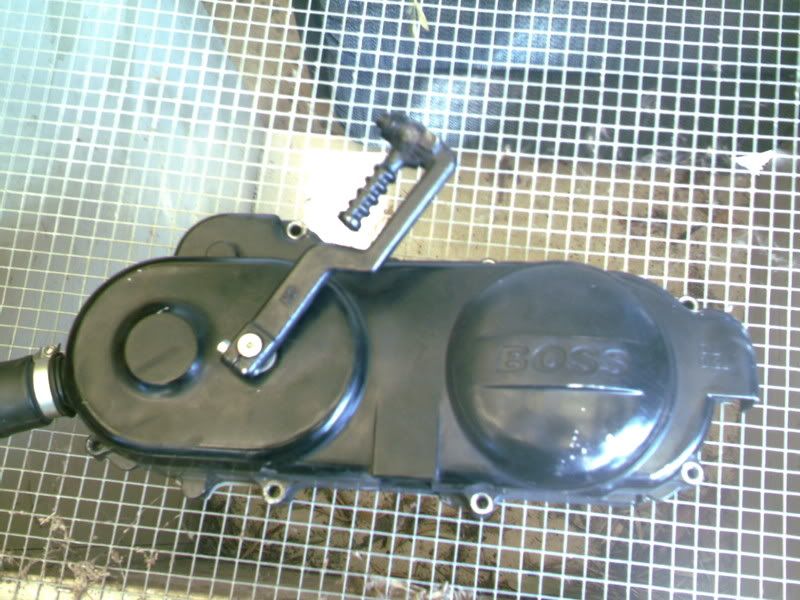
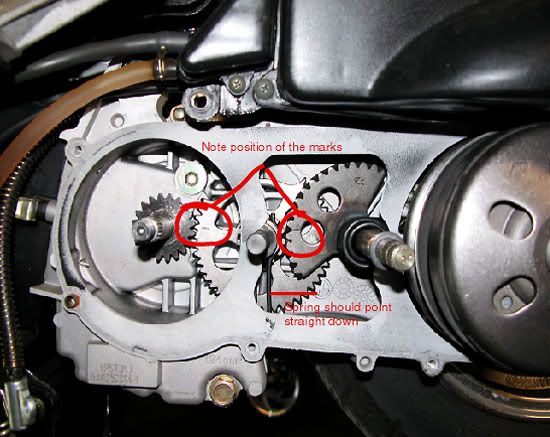
 The Chinese have been known to put a rev limiter CDI in the scoots but that's rare here in the states. It works off of a sensor mounted to the inside of the belt cover that sits next to the clutch pulley that counts clutch RPM's. When the limit is reached the CDI stops the spark plug from sparking until the scooter slows below the set limit. Simply disconnecting the wire or cutting the wire from the sensor negates this restriction. The sensor can be removed if you like.

Sensor:


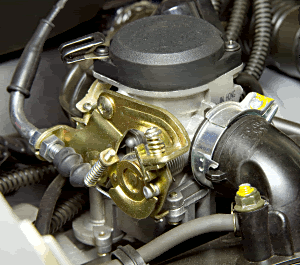
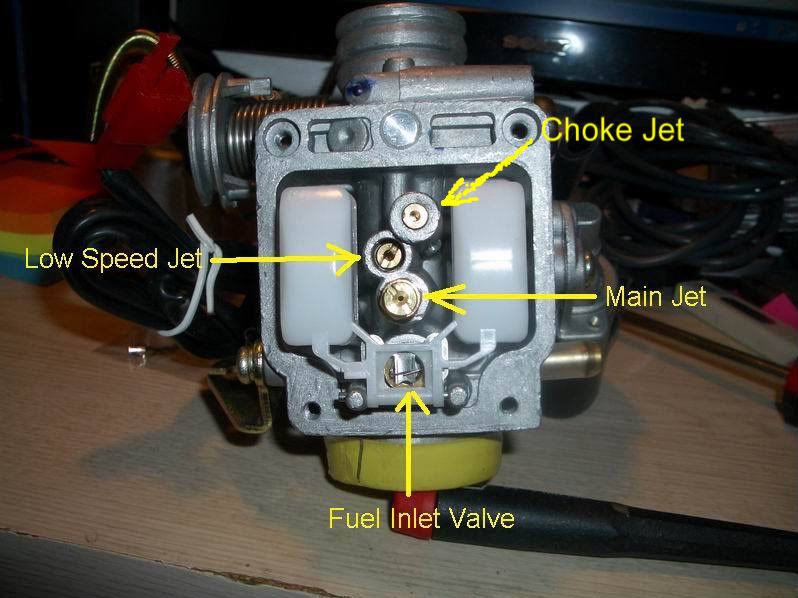
Next is the carb needle. There is a needle inside the carb with a movable clip sometimes. Moving the washer down a notch will enrich the high speed mixture and vice-versa. Some carbs have a fixed washer. Playing withe the needle position can increase power. A good running scoot will have a nice brown plug so after changing anything you want to look at the spark plug after a ride around town. Here's a good link for reading plugs:

http://www.verrill.com/moto/sellingguide/sparkplugs/plugcolorchart.htm

The last known restriction is the use of a smaller than normal main jet in the carburetor, in concert with a plug in the air intake. Normal is around a #85 to #90 but the Chinese will install a #76 or #78 jet to slow you down. The number is stamped on the jet usually. You may need a magnifying glass to read it. To de-restrict you buy a #80, #84 #85 and a #90 jet, try them all one at a time till you get good power with a brown spark plug.  Remove the plug in the air intake if you have one. The air filter box may have a small tube inside that can be removed as well to increase air flow if plug is black.

NOTE: Jetting is a trial and error job usually. Gotta keep doing plug color reads after each change unless it's obviously not running right.  Wink


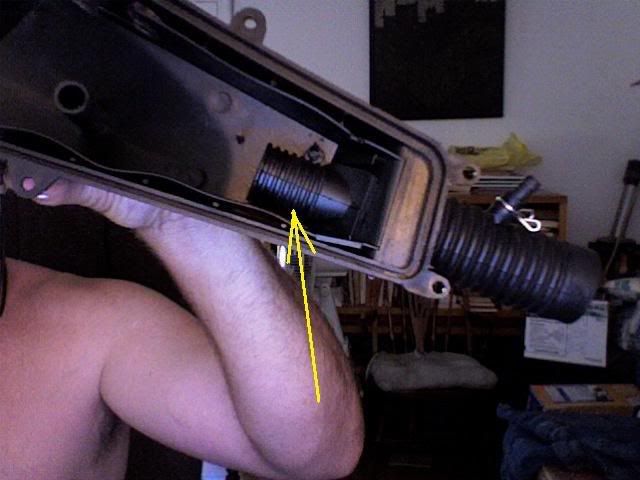
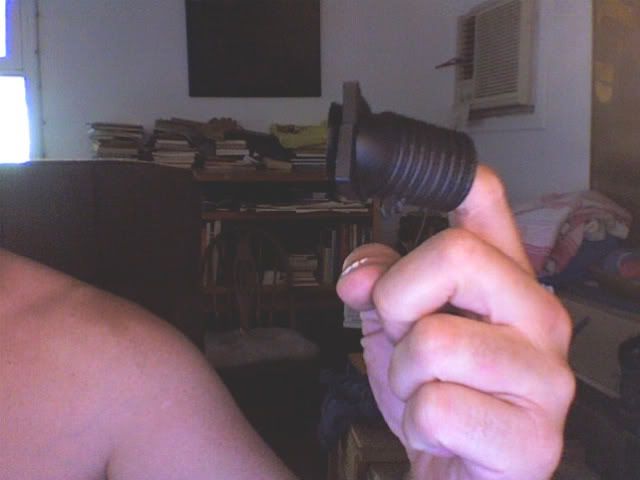
 Tube in airbox cover:


Removed:


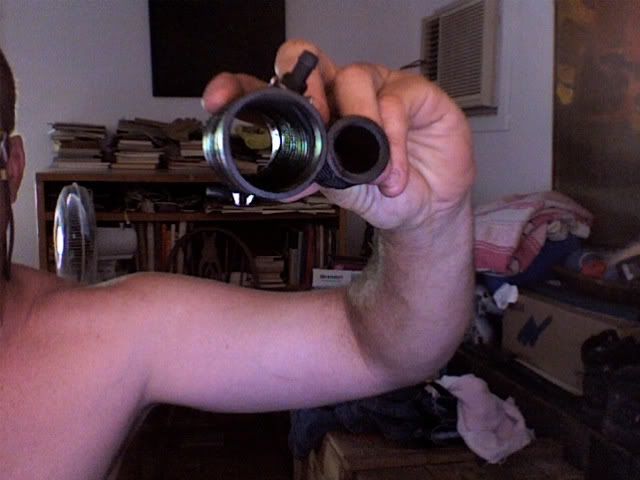
Here's a comparison shot of the intake tube and the smaller tube inside the cover.


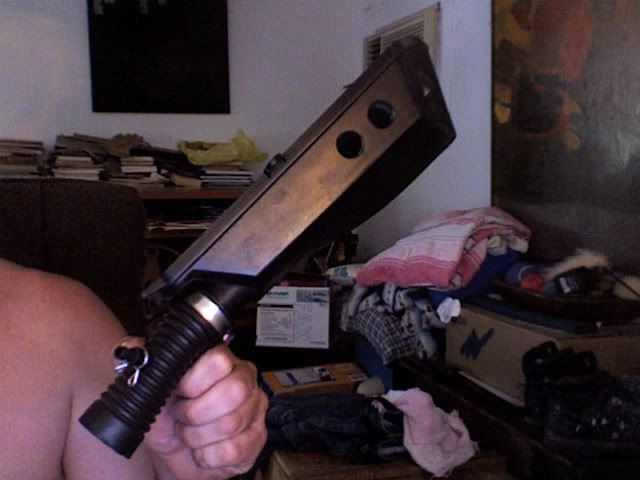
I actually drilled holes in an airbox cover to increase air flow a little:


  all info on desrestriction procedure goes to fox of scooter forum online

Sunday, August 14, 2011

Add a 12v socket to any scooter

There are lots of uses for a 12v power outlet on your scooter. For example:
  • Charging or powering a cell phone
  • Powering a GPS unit
  • Powering a Radar detector
  • Powering an electric tire inflator
  • Powering an auxiliary light
  • Charging your scooter battery
  • Powering heated gloves
Adding a 12v power outlet isn't difficult at all. You can find one at places like eBay or Amazon.com. What you'll usually get is a 12v socket (also known as a "cigarette lighter" socket) with an attached inline fuse. If it doesn't come with a fuse, it's a good idea to add one. To mount the outlet you'll usually have to make a hole about 1" in diameter somewhere on the scooter. I've seen them installed inside the "glove box", though that would mean you'd need to open the "glove box" to get access to it. On my scooter I installed it just below the front of the seat. There's an access panel below it which allow you to get at the spark plug and valve cover, and that also allows access to the back of the power socket for easy wiring.
12v outlet on scooter
The socket can get its power from any 12v line. You can pick one that's activated by the ignition switch, or you can do what I did and connect it directly to the battery (via a fuse of course) so that you have power available at all times, not just when the ignition is turned on.
Most motorcycle batteries have a capacity in the 3-7 amp.hour range, so you can't draw a huge amount of power from them. My outlet is fused at 8 amps, which is enough for a 55W auxiliary light (which draws about 4 amps) or a tire inflater (typically 2-3 amps), heated gloves (typically 1-2 amps) and more than enough for any electronic gadget such as a radar detector or GPS unit (typically well under 1 amp). Don't try drawing huge amounts of power though. The battery is quite small and could run down quite quickly if the engine isn't running to recharge it. Even if the engine is running you could strain the alternator (generator) if you try to draw too much power.
Installation of a 12v outlet is simple. The one I added mounted in a 1" diameter hole. I cut it out with a hole saw and smoothed the edges with a file. Since you're likely to be cutting the hole in plastic, this isn't a lot of work. The negative (black) lead connects to the chassis of the scooter. The red lead connects to the fuse and the fuse connects to the positive (+) terminal of the battery. Make sure the wires are secured using nylon cable ties so that they don't get caught up in any of the scooter's moving parts and they don't rub against any hot parts of the engine which could melt the insulation on the wires and cause a short circuit.
scooter 12v auxiliary power outlet
As I mentioned above, as well as using the 12v outlet to power external equipment, you can also use it to charge the battery. On my scooter it's not easy to get direct access to the battery terminals. You have to remove the "floor mat" and then remove a door to expose the battery connections. With the 12v outlet wired directly to the battery (via an 8 amp fuse in my case), you can simply attach a 12v plug to the charger (mine came with one) and plug it into the 12v outlet. For most scooter and motorcycle batteries a charger of 2 amps or less is fine. I use my charger to keep my battery in good condition over the winter when the scooter sits in the garage for weeks at a time waiting for a day that's warm and dry enough to ride!
I also use the outlet to power a 12v tire inflator. The battery has plenty of power to inflate both the front and rear tires from 0 to 32 psi. After inflating both tires the scooter started right up, so there's no danger of running the battery down in normal use. Having the outlet available makes topping up the tires a simple job, and if it's easy to do you are more likely to do it.

wiring diagrams

a basic set of common wiring diagrams for the 150cc scooters as well as many of the 50cc gy6 scooters
Okay, so from time to time, we get queries about wiring diagrams so I thought I'd post a couple of generic diagrams I have.  Feel free to add your own diagrams!

Note: Your scooter may differ from these but they are a good guide anyway...


This pic shows the location of some of the components under the front plastic on a lot of scoots. Your scoot may differ...


proper kick start mechanics for 50cc and 150cc scooters

50cc:

The kick starter on your Chinese scooter is for emergency use only. It's not designed for every day prolonged use.

50cc:

If you want your kick starter to last for the life of your scooter then go ahead and remove the lever and re-install it at a 1:30 or 2 o'clock position so you get a little more travel when you kick it. This way you won't crack the case as easily. The case cracks when the lever is on the bottom of it's stroke and you're still kicking, or if you kick it too hard. You shouldn't have to kick with all your might to start a healthy engine. Moving the lever up a little will allow a better mechanical advantage and lessen the chance of cracking the case. 

You have to remove the bolt from the lever completely to get the lever to slide off. Tapping a flat screwdriver in the space where the bolt goes through will open the clamp and the lever will slide off with little effort.

The little half-moon shaped gear should be positioned as show in the second and third pics to get full range of motion. You can change the position by pulling the round gear out a little bit to un-mesh the gear teeth, then use the kick lever to re-position the half-moon gear and push the round gear back in to lock it in place. You'll see.   Cool

 To remove the cover you simply remove the 8 (short case) or 10 (long case) bolts around the perimeter of the cover and it will pull off. The kick lever makes a good handle to pull on but if it's the first removal, you may need to hit the case on the back with a rubber hammer to break the seal on the gasket. If the gasket tears it's okay. Just replace it torn or remove it altogether. It's really not necessary to even have a gasket on there.

When kick starting, it's best to work the kicker slowly until you feel resistance against your foot. That means the engine is on a compression stroke. At that point, let the kicker come back up to the top before you kick it. The engine is more likely to fire on a compression stroke with a full kick. If it doesn't start on the first kick then repeat the process. Don't just kick it willy-nilly.   Wink

Kick lever re-positioned.


Proper position of the kicker gears. I always put a small dab of grease in the starter clutch bushing.


Case cracked  Sad


150cc:

The kickers on the 150cc scoots are fragile as well. There are a lot of moving parts that are subjected to belt dust so keeping things clean and a little dab of grease on the shaft ends of the gears is good preventative maintenance. And like the 50's, DON'T KICK TOO HARD!  The case can/will crack rendering the kicker useless.

Clean and grease the ends of the shafts where they pivot only! Some grease where the kicker shaft passes through the belt cover is okay but just a little. You do not want grease to migrate to the belt and pulleys. Wink

You can remove the lever and reinstall it so it's a little higher up on some scooters so you get a little more travel. On some scoots the body plastic prevents you from doing that.

Dirty gears... YUKK!


Proper position of the gears when re-installing:


Components:


thnx to fox of scooterforumonline


Saturday, August 6, 2011

Issues with the electric start

When dealing with the electric start, and it is not wanting to crank but it will start via the kick-start the things to remember is that the electric start functions through something known as the flywheel. The flywheel is essentially copper wound up on some coils spinning on a wheel tapping against conduits that will generate a current which in turns start the scooter up. If you find that it is not starting with electric but will start with the kick start then you must pull the flywheel of and clean it as well as check the coils for looseness if they are loose in any way then that will take out the integrity of the electric start as tight coils are a must for proper connectivity, if they arent tight take a pair of pliers and tighten the coils up. also check the ignition coil for any build up on the connectors as well as if the spark plug boot is loose or gummed up. if all these are ok then the next step would be to follow up with both a valve tune up and carb cleaning to ensure proper function and fuel flow.

Sunday, July 31, 2011

gy6 4stroke engine manual

the link provided will take you to a manual fo the gy6 engine this manual includes details on how to break apart the engine piece by piece as well as guidelines for most routine maintenance procedures such as tune ups oil change brake change shock change they are included in this manual

http://k.b5z.net/i/u/6023538/f/4-Stroke_Engine_Manual_rev2.pdf

the starter torn apart

I decided to unbolt it and see whats going on inside. I took a few pics just in case anyone wanted to see for themselves.

[image]

[image]

[image]

Once I cleaned all the crap out it looked a bit better inside.
[image]

I gave the contacts a rubdown afterwards to improve contact.
[image]

Well there it is back together. Once I greased it up and mounted it back on my bike the nasty noise had gone.
[image]


credit to dogmeat of scootdawgforums